From Windows to Mac: easy switch with the Migration Assistant
One of the things that users dread most with a new computer is transferring data from the old computer. Certainly when transitioning from Windows to a Mac. Luckily, that is very easy and is done automatically.

When you have purchased new computers for your company, you cannot avoid the need to transfer data. How to ensure that all documents, email accounts and system settings are transferred? The answer is simple: by using the Migration Assistant.
The program can be found on every Mac. When you first put a Mac into use, the Migration Assistant automatically starts. It gives you the options of transferring data from a Mac, a Time Machine back-up or start-up disk, or from a Windows PC. You can download a Windows version of the Migration Assistant for the latter. This link is for macOS Big Sur; special versions can be found for older macOS versions.

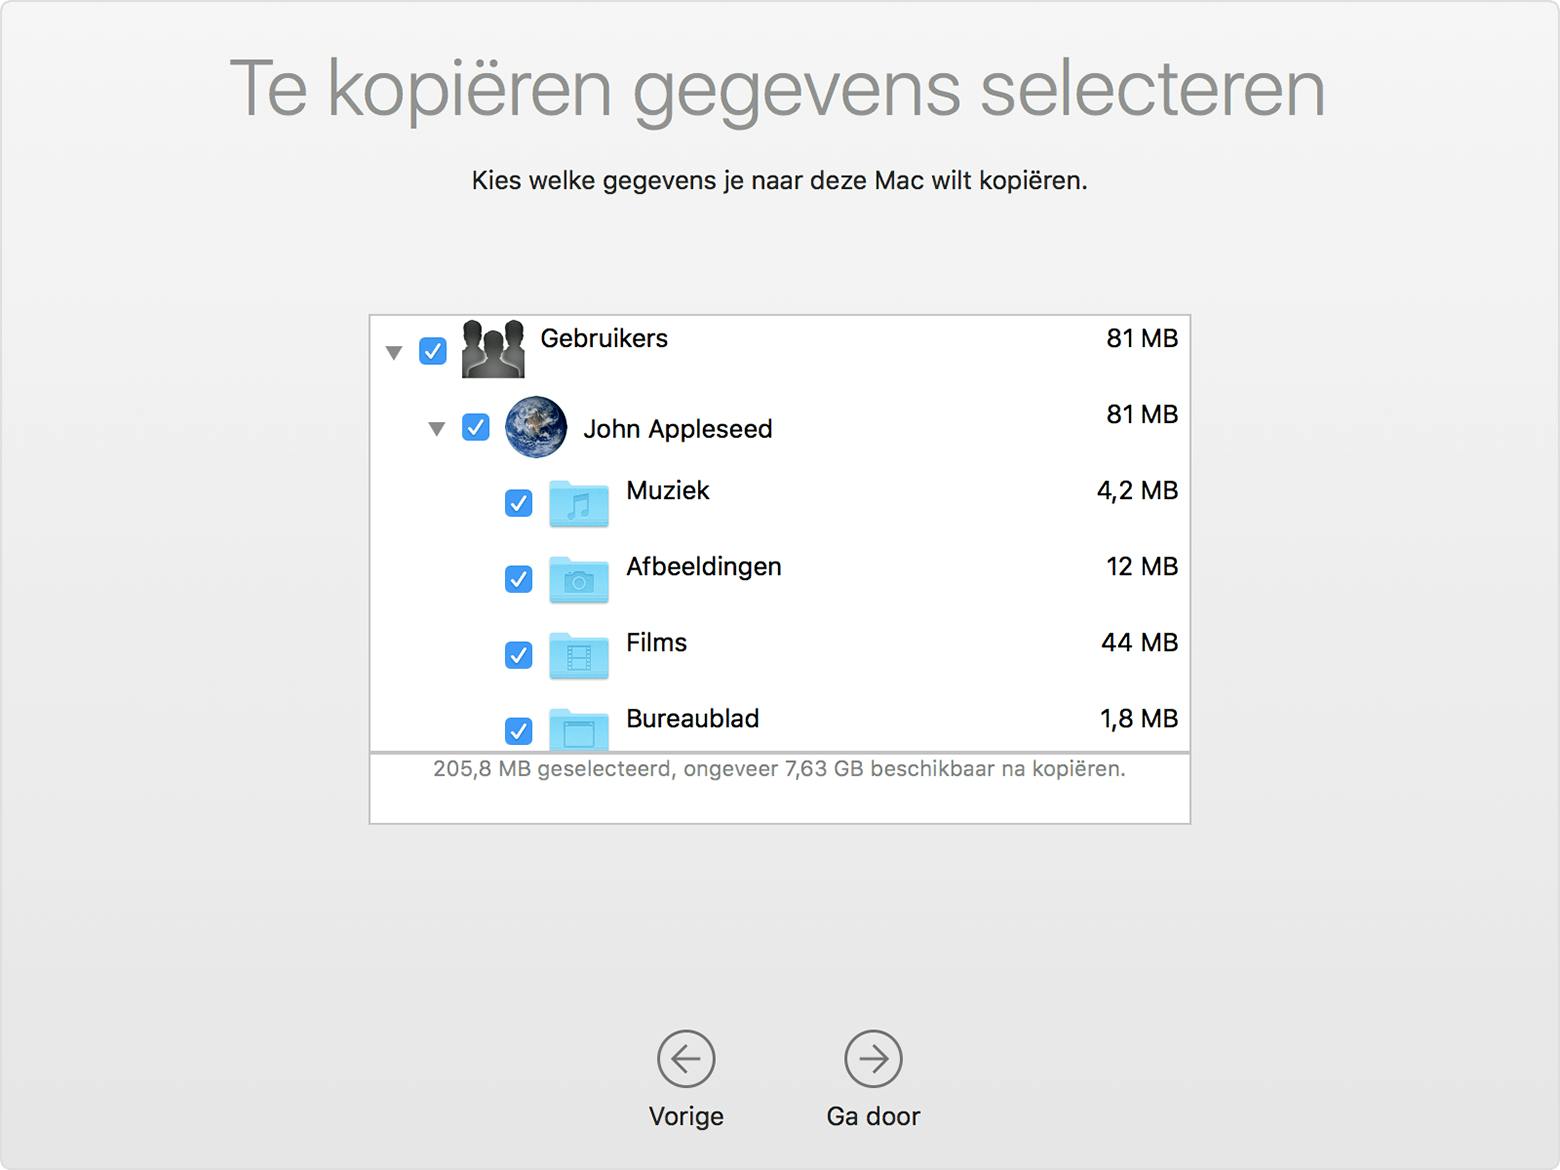
Briefly put: start the Windows Migration Assistant on the old Windows PC, start the Migration Assistant on the new Mac, on which you select “from a Windows PC”, then select the PC in the list of available computers. Wait until a connection has been established (both will display the same digit code), and then until the Mac has scanned the folders on the PC. Next you can deselect the folders that you want to skip. The rest happens automatically.
But keep reading! We have a few tips that could help you to make things even easier. And at the very bottom you will find information about the data that the Migration Assistant will transfer for you.
Network connection
Naturally, both computers must be connected to the same network. A wireless network is fine, but may take some time, especially a lot of data is involved. You can accelerate this by connecting the computers to a wired network or by connecting them directly to one another with an Ethernet cable. You will need an adapter for MacBooks, however, as these are not equipped with a network portal. An adapter from USB C to Ethernet, or from Thunderbolt to Ethernet, for example.
Preparation
A few preparations can be made to ensure the transfer progresses smoothly. To begin with, you need an administrator password for the PC. Make sure that all programs on both of the computers have been closed. If you use cloud-based storage, it is best to delete it first. Some services are not compatible with the Migration Assistant, and this will often involve a large quantity of data. And of course you can simply download these data from the cloud once the Mac is ready.
It cannot hurt to check the Windows PC’s drive for errors. How to do this can be found in the Windows manual.
Switch off all cloud-based storage: this will save a lot of time during the transfer.
After the transfer is completed
Do the displays on both computers indicate that the transfer is completed? If so, you can switch off (and remove) the PC. Now log in on the Mac with the user account that was just transferred from the PC. You may create a new password, or you can use the existing one.
Now you can create an Apple ID or, if you already had iTunes or Apple Music on the PC, you can use that Apple ID to log in. Do not forget to authorise your computer before synchronising with iTunes or Apple Music, so that Apple knows that the items you purchased on your new Mac also belong to you.
Which data are transferred?
Obviously, not everything can be 100% the same on the old PC and the new Mac. The operating systems are simply too different. The following files and data are transferred:
System settings – the language, location and desktop images are transferred.
Browser – the home page in your browser is transferred to Safari, the standard browser on the Mac. All of the bookmarks are transferred as well.
iTunes – music is transferred to Apple Music, videos to the Apple TV app, podcasts to Apple Podcasts and audio books to Apple Books.
Images – photos and other images are transferred to the home folder. From there you can transfer them yourself to the Photo app – or have the app search the entire drive for photos to be imported.
E-mail, calendar and contacts – all e-mails, appointments and meetings, and contacts are transferred to the Apple apps Mail, Calendar and Contacts. With Outlook, this will only work with the 32-bit version. If you use the 64-bit version, it is wiser to manually create the accounts on the Mac. These can be entered at System Preferences/Internet accounts.
Furthermore, all files from the home folder and the subfolders on the highest level of the user who is logged in on the PC are transferred. Along with the files from the “Windows” and “Program Files” folders, as long as these are not system files, and the folders are on the highest level on all drives.
Switch now
Did you still have doubts about switching to the Mac? Not anymore, hopefully! Contact us and we will assist you with advice, financing and implementation.


